Home > Configuration Portal > Approval Workflow Management > Create a New Approval Process
Create a New Approval Process
Follow the steps to create a new approval process:
-
Navigate to Administration > Approval process.
-
Click the Create button on the command bar.
-
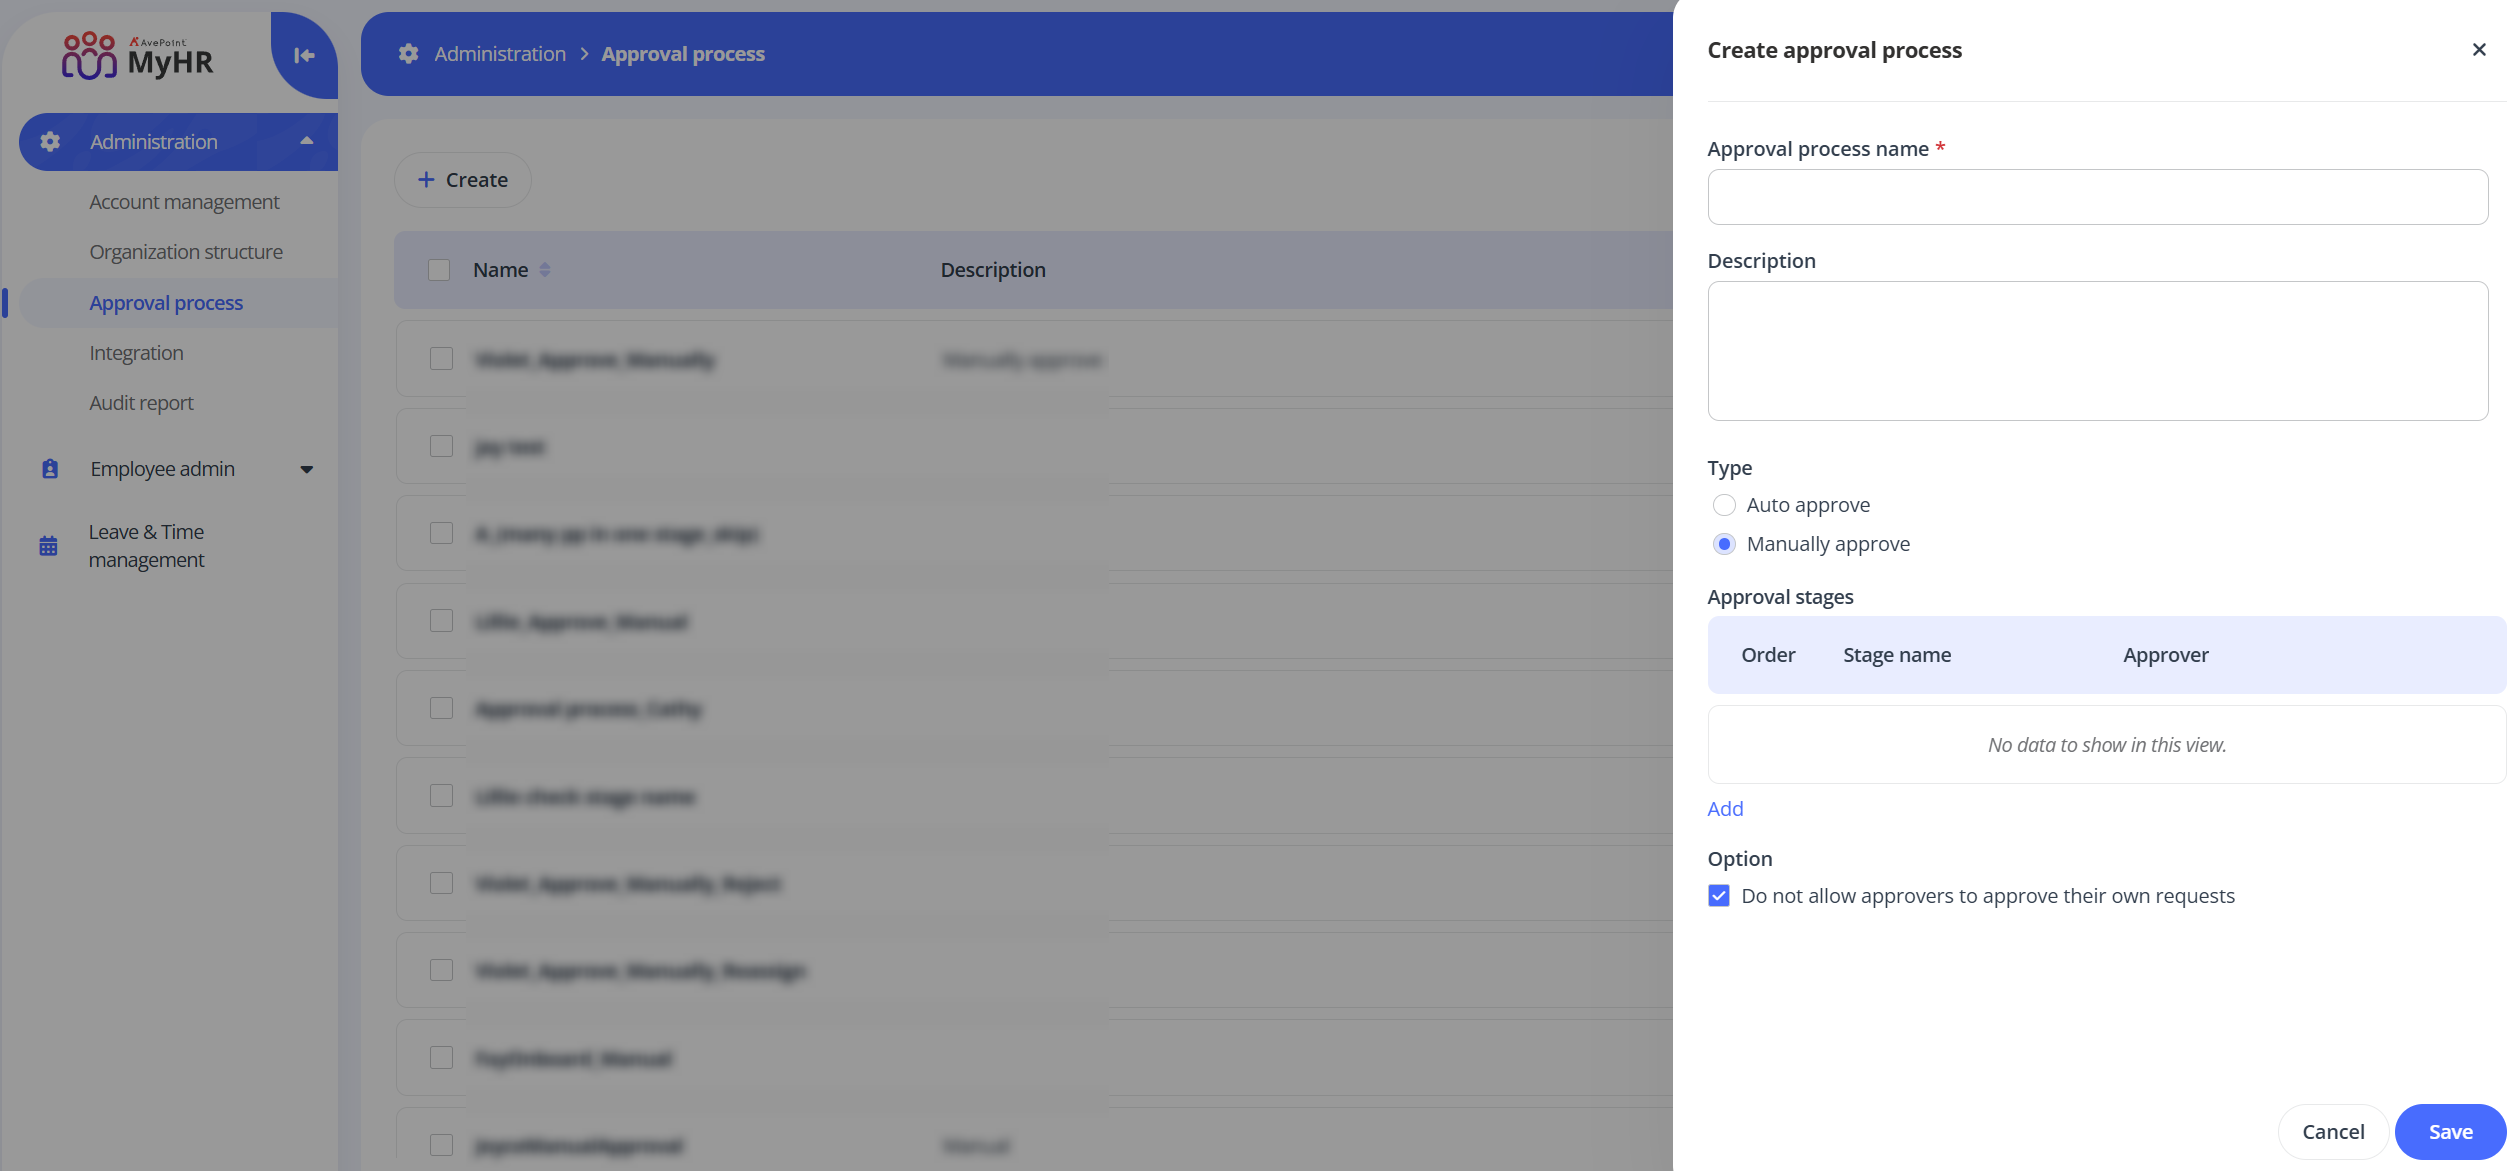
In the Create approval process panel, enter a name and description for the approval process you are creating. The description is optional.
-
Select a type for the approval process.
-
Auto approve – Requests using this approval process type are automatically approved without requiring any manual action.
-
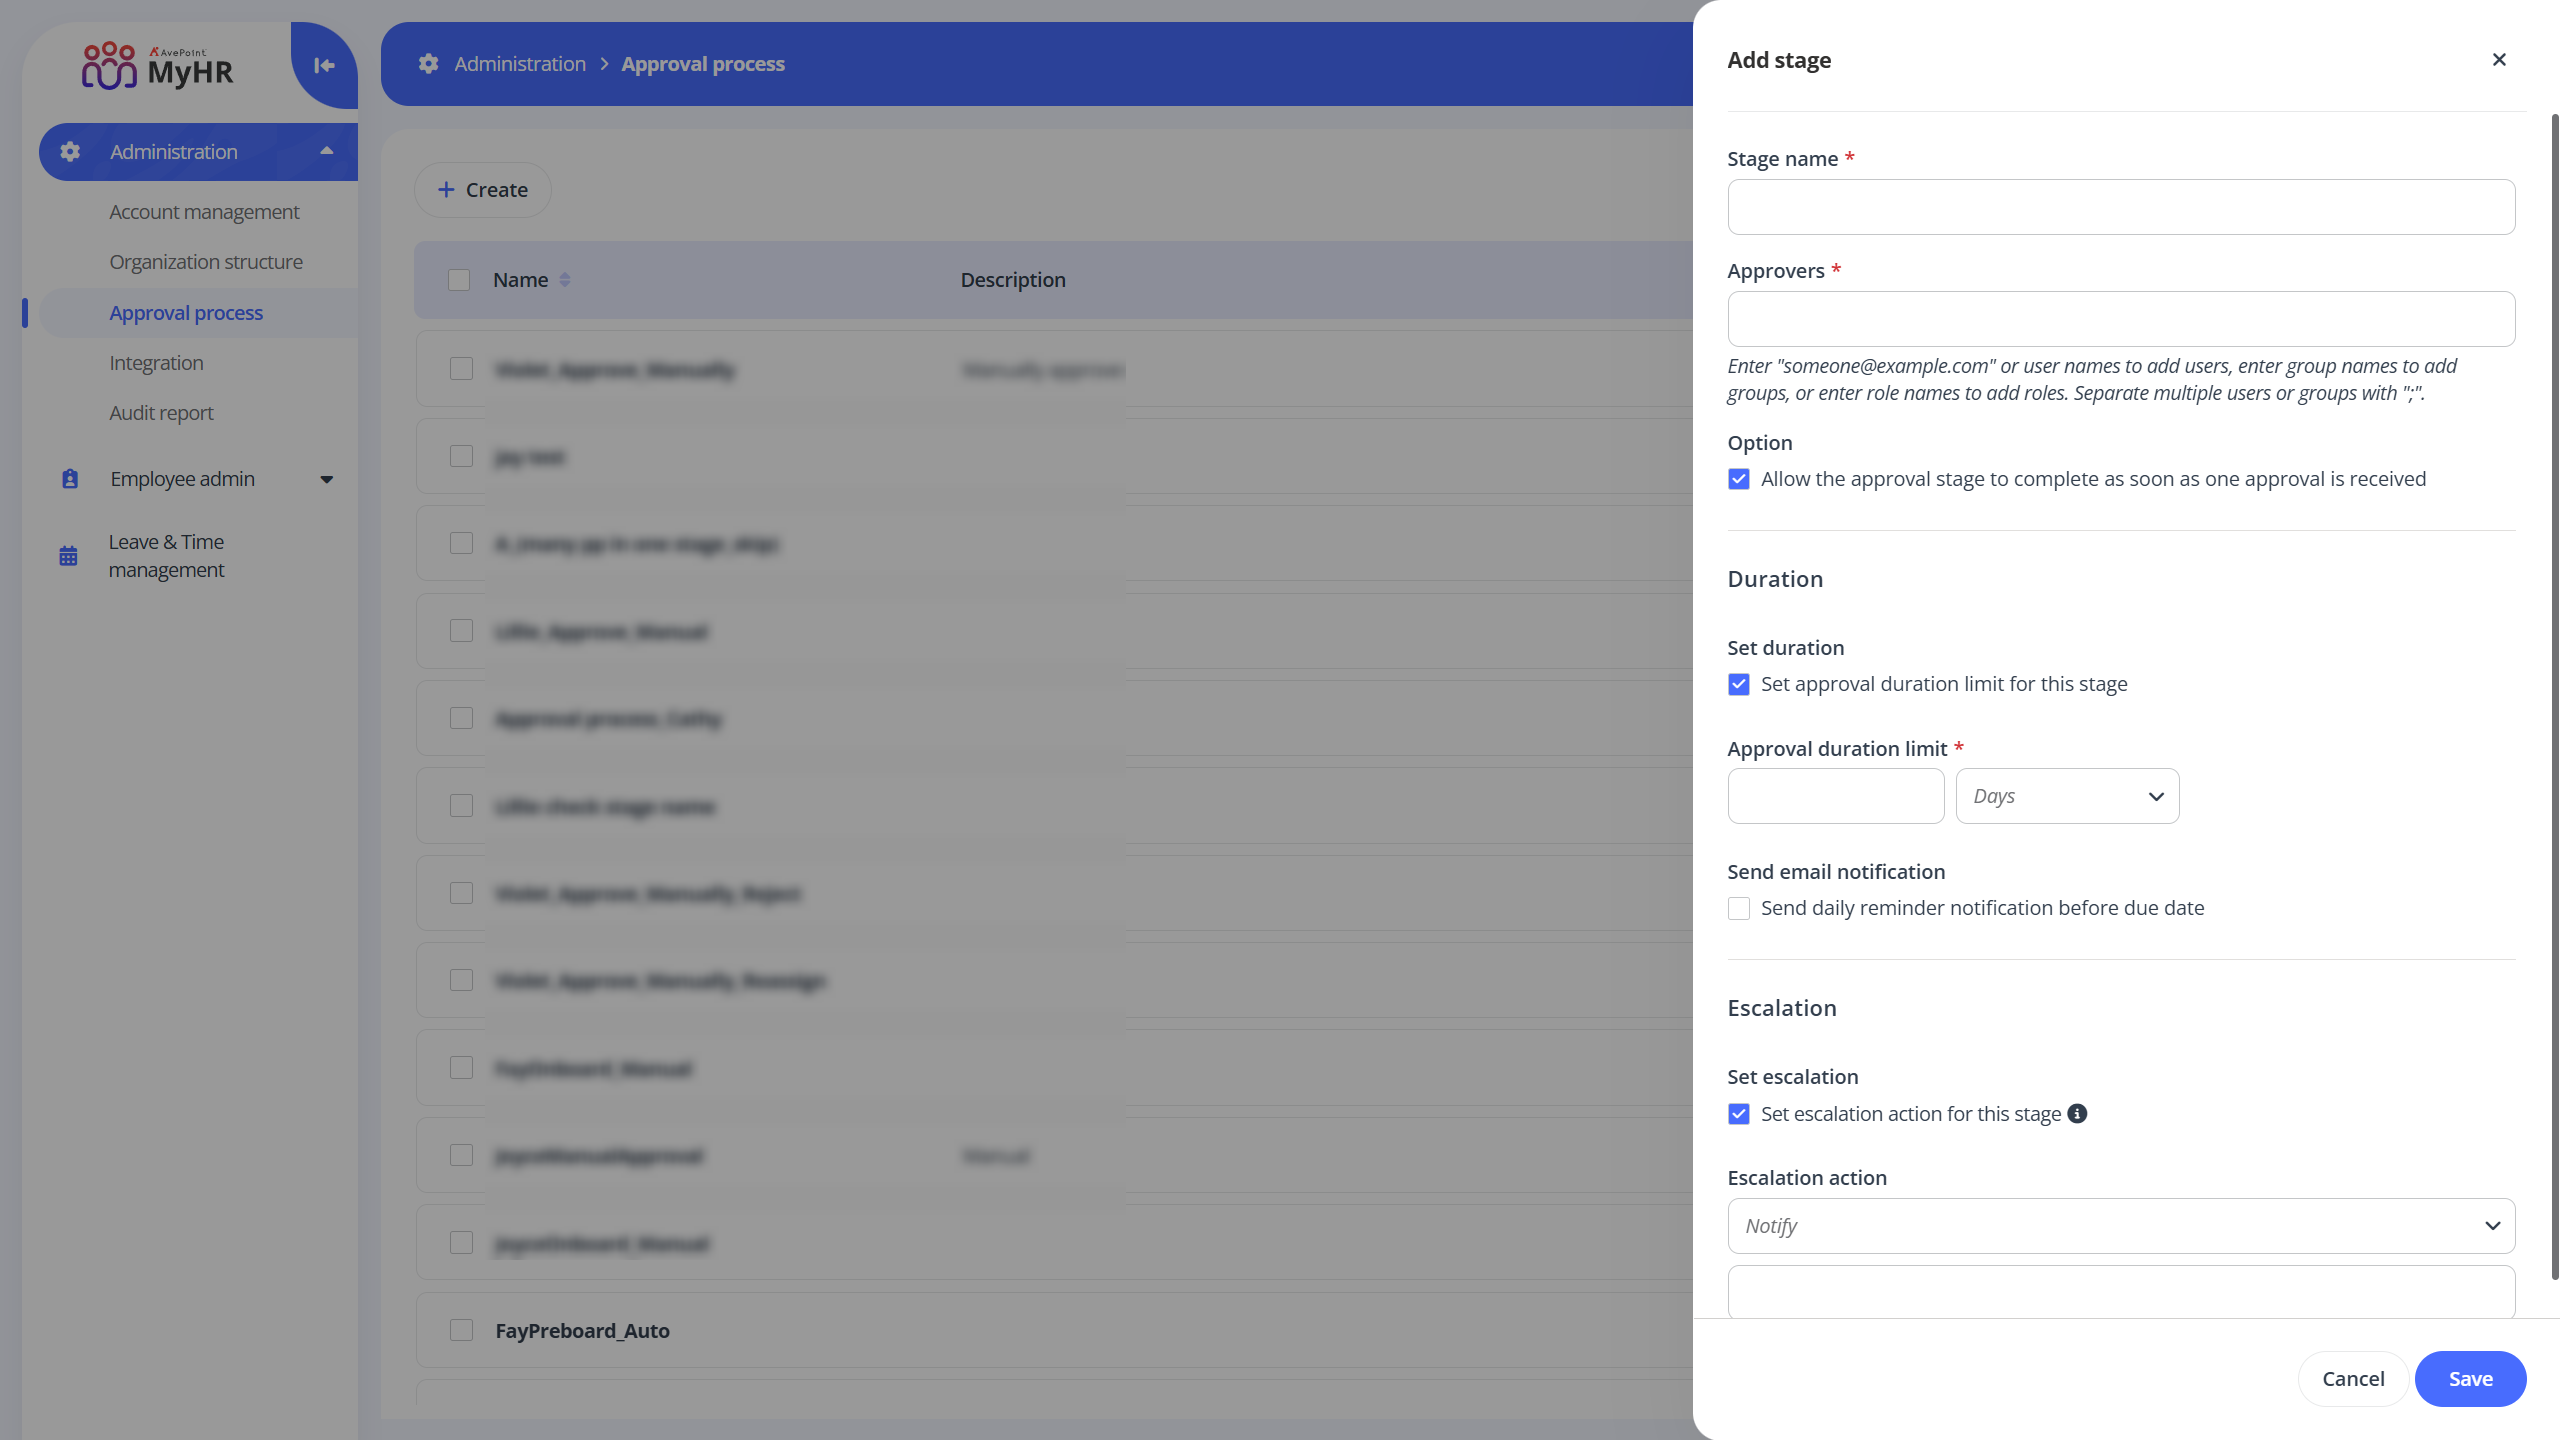
Manually approve – Requests using this approval process type will be processed following the configured approval stages in order. Click Add to add an approval stage for the process. In the Add stage panel, complete the following settings:
-
Stage name – Enter a name for the approval stage.
-
Approvers – Enter the email addresses or the names of users, groups, or roles that you want to set as approvers.
-
Option – Choose whether the approval stage should be completed when any one approver approves, or if all assigned approvers must approve before moving to the next stage.
-
Duration – Select the Set approval duration limit for this stage option to require completion within a certain period for the stage. In the Approval duration limit section, enter a number in the text box and select weeks or days from the drop-down list as the duration limit unit.
You can also select the Send daily reminder notification before due date option to configure the email notifications, which will be sent during the specified period prior to the approval duration deadline.
-
Escalation – Select the Set escalation action for this stage option if you want to trigger an escalation action when the stage isn't completed within the configured approval duration limit.
Select an escalation action from the drop-down list and then enter the users, groups, or roles that to receive the escalation.
- Notify – Send a notification to the users, groups and roles.
- Reassign – Reassign the approval task to the users, groups, or roles.
- Reject – The request using the approval process will be automatically rejected in the current stage.
-
-
-
In the Option section, select the Do not allow approvers to approve their own requests option to prevent requesters from approving their own submissions.
-
Click Save to save this approval process.