Home > Configuration Portal > Leave and Time Management > Manage Holiday Policies > Create a New Holiday Policy
Create a New Holiday Policy
Follow the steps below to add a holiday policy:
-
Navigate to Leave & Time management > Holiday policy and then locate the layer you want to add the policy.
-
Click Add.
-
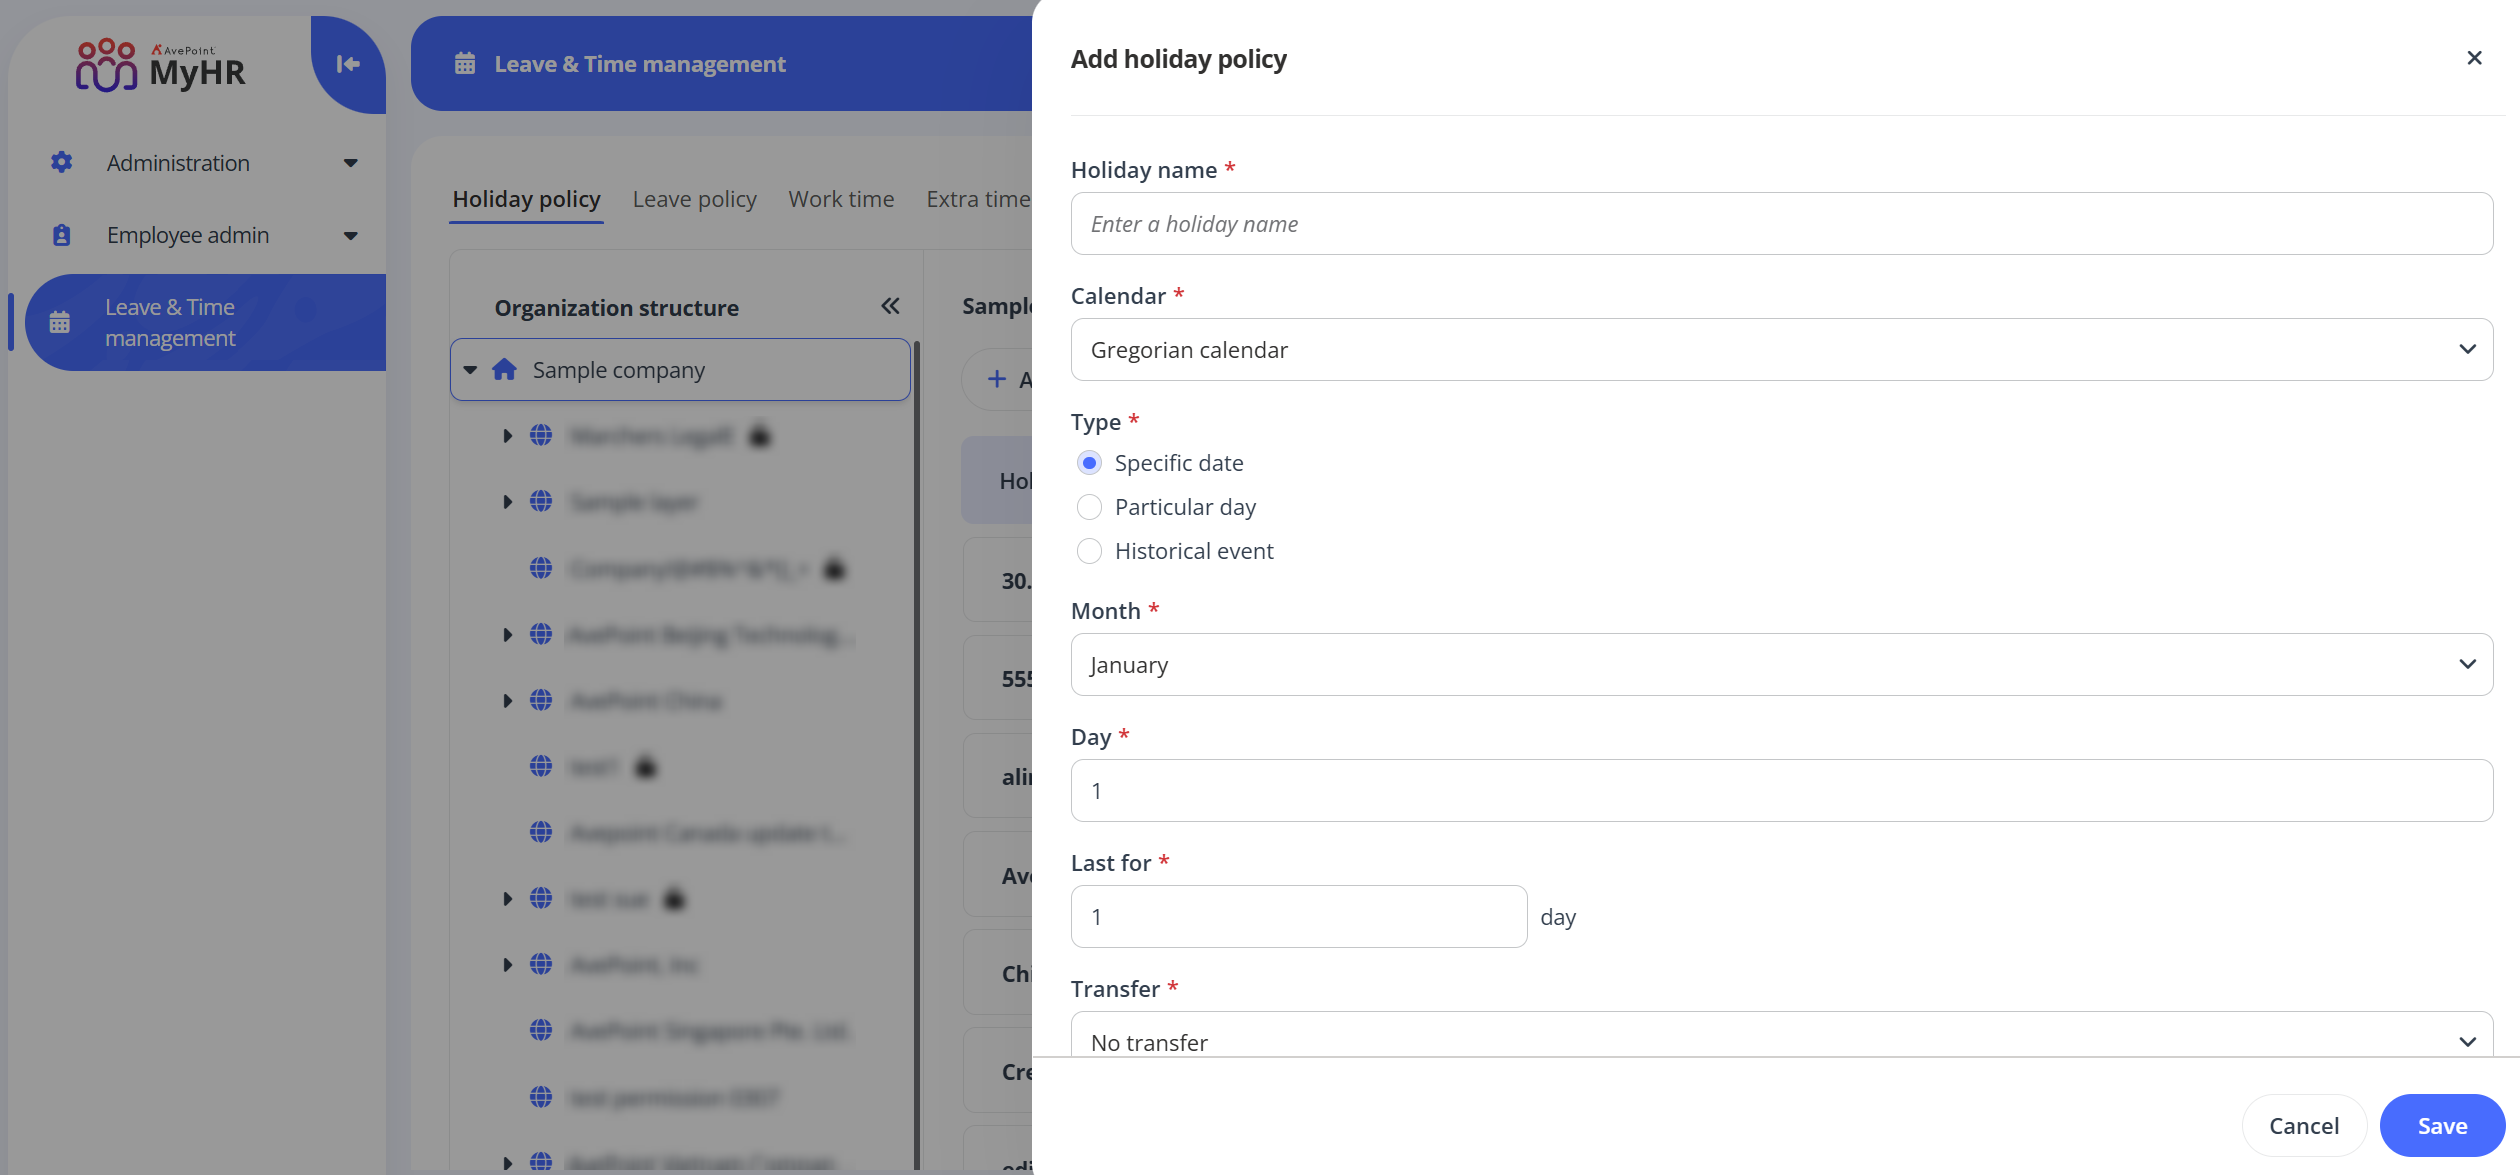
In the Add holiday policy panel, complete the following settings:
-
Holiday name – Enter a name for the holiday policy you are creating.
-
Calendar – Select a calendar type.
-
Type – Select a type for the policy.
-
If you select the Gregorian calendar, you can select a type as required.
-
Specific date – Select a month from the Month drop-down list and enter a date number in the Day text box.
-
Particular day – Select month, order, and day for the holiday policy.
-
Historical event – Select an event from the Event drop-down list.
-
-
If you select the lunar calendar, the type is set to Specific date by default and cannot be changed.
-
-
Last for – Configure how many days the holiday will last for.
-
Transfer – If the holiday falls on a scheduled day off, choose how to transfer it.
-
Move forward – Shift the holiday to the next working day.
-
Move backward – Shift the holiday to the previous working day.
-
No transfer – Maintain the holiday on the original day.
-
Nearest day – Shift the holiday to the nearest working day, which could be either the day before or the day after, depending on the specific policy in place.
-
-
-
Click Save to save this holiday policy.